Showing posts with label 3D printing. Show all posts

Tuesday, 8 January 2019

3D printing lab ware


I’ve been interesting in 3D printing and its application in the lab for a while now. I’ve argued elsewhere online about how I think that a 3D printer is a smart move for any lab or department, offering a handy way to easily produce a wide array of custom lab equipment. I’ve also posted on this blog in the past about my own use of 3D printing to make immune molecules and my first custom plasticware – an adapter to allow 50 ml conical use with a 15 ml tube rotater.
However I’m lucky enough to be in a lab with a PI who also sees the potential of 3D printers for a biology lab – so he bought one! This has given me more leeway to play around designing labware, as I can squeeze prints and measurements to refine models in between experiments.
I thought I’d start simply with the basics; tube racks. Or more specifically, tube holders which can be easily configured in different arrangements into racks (e.g. using something like Tinkercad, which I used to make the models). So far I’ve made holders for (micro-) centrifuge tubes of the three tube sizes most important to a wet lab biologist: 1.5 (2), 15, and 50 ml.
All of these STL models are freely available on my Thingiverse page, as are the few larger racks I’ve made and tested out, along with a few other bits and bobs. I encourage those of you out there with printers to try them out - please let me know if you do. 
More importantly, I’d invite everyone to think about what tasks in the lab could be made easier, quicker, or even possible, through the addition of pieces of plasticware that don’t currently exist. Think about them, then find someone with a printer and have a chat about making them real!


Sunday, 29 July 2018

3D printed 15 to 50 ml tube rotator converter

Sometimes you just need to leave something in the lab, but you might not always have the right sized rotator brackets. This is the situation that pops up in my lab, where we have a rotator in the cold room - one of those old classics which is probably older than me and will outlive us all - but which only fits 15 ml tubes. I decided to solve this problem over

Enter the 3D printer. I knocked together a couple of quite prototype models in Tinkercad, then one quick test and a re-tweak later I've got a working adapter, letting you rotate 50 ml conicals in 15 ml brackets. I've put it up on Thingiverse so anyone can download the STL and make it themselves.

This is the joy of 3D printers; I went from a problem to a solution after an hour's work. There's probably a whole host of other little problems or inefficiencies that could be solved in the lab with the addition of a custom bit of kit - we just need to be clever about thinking what those are and how to build them!


Tuesday, 3 June 2014

The Inner Army Crept Up On Me


Tonight saw my maiden voyage into the world of giving public engagement talks about science. It came as a particular surprise because I thought I was just the delivery boy.

The event was The Inner Army, an hour of immunological discussion at the CheltenhamScience Festival, with Professors Susan Lea and Clare Bryant presenting.

I'd been approached by the British Society of Immunology (BSI) about perhaps 3D printing some immune molecules for the talk, after seeing some of my previous models. I'm a big public engagement proponent, and a big fan of the festival, having blogged about it for my university in the first year of my PhD, so I leapt at the chance to help out*. Plus it gave me a nice chance to show off the demonstrative use of my models (and help justify the time I've spent making them!).

Little did I know that on arrival the chair for the event, the illustrious Vivienne Parry (who was originally an immunologist herself) decided to get hold of an extra chair and mic and throw me up on stage as well!

It was – I think – a fun and informative event. However, I can take no credit for any of it (except for most of the models): I choked! Give me small numbers of people and I'll happily ramble on about adaptive immunity to the cows come home. Sit me down next to two prominent professors in front of ninety people and ask me to talk about structural innate immunity and it turns out I get a bit tongue-tied. Live and learn!

I was very happy to see how involved the audience seemed to be with the models (particularly the first row, which seemed to be largely composed of BSI and British Crystallographic Association (BCA) members), which was very gratifying. It was also lovely to see the general public engaging with immunology in person, which isn't something I get to see on a daily basis.

For the moment I'd be lying if I said I wasn't more comfortable on the other side of the spotlights blogging about the event (which I suppose is what I'm doing now). This isn't something that comes naturally to me, or (I suspect) a lot of science post-graduates; it just isn't a skill we get to practise much in our day-to-day workings.

However, engaging with the public remains an important task for scientists, both to justify the tax-payer money we spend and to share the love of uncovering the secrets of the universe with fellow curious minds, so I shall definitely try again. Next time though, I plan to stick to TCRs.

* NB I plan to share photos of the models I made for the speakers in a future post, but as the models dispersed to the relevant speakers after the talk I have to dig them

Wednesday, 29 January 2014

Immunological 3D printing, the how-to


Here's a quick overview of the different stages of the process I went through to make the 3D printed T-cell receptors detailed in part 1.

Part 2: the process

Now there's a couple of nice tutorials kicking around on how to 3D print your favourite protein. One option which clearly has beautiful results is to use UCSF's Chimera software, which was also the approach taken by the first protein-printing I saw. However this seemed a little full-on for my first attempts, so I opted for relatively easy approach based on PyMol, modelling software I'm already familiar with.

The technique I used was covered very well in a blog post by Jessica Polka, which was then covered again in a very well written instructable. As these are both very nice resources I won't spend too long going over the same ground, but I thought it would be nice to fill in some of the gaps, maybe add a few pictures.

1: Find a protein

This should be the easy bit for most researchers (although if you work on a popular molecule finding the best crystal structure might take a little longer). Have a browse of the Protein Data Bank, download the PDB and open the molecule in PyMol.

All you need to do here is hide everything, show the surface, and export as a .wrl file (by saving as VRML 2). I mean that's all you need to do. If you want to colour it in, that's totally fine too.

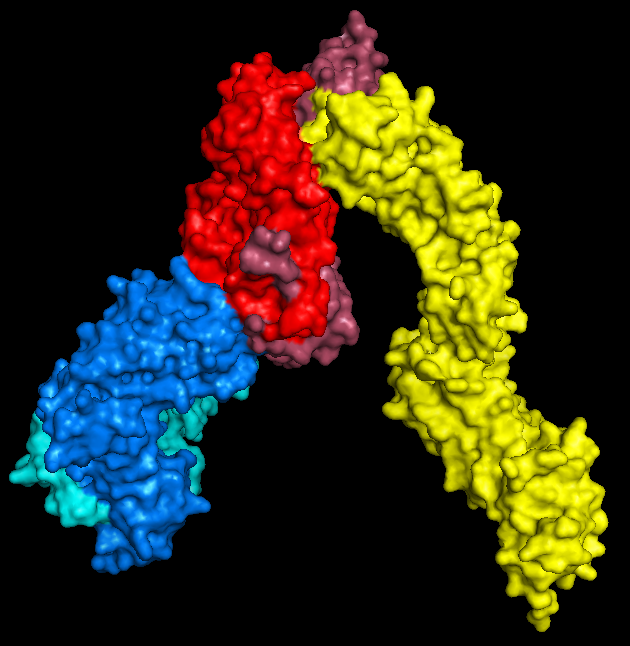
PyMol keeps me entertained for hours.

2: Convert to .stl

Nice and easy; open your .wrl file in MeshLab ('Import Mesh'), and then export as  a .stl, which is a very common filetype for 3D structures.

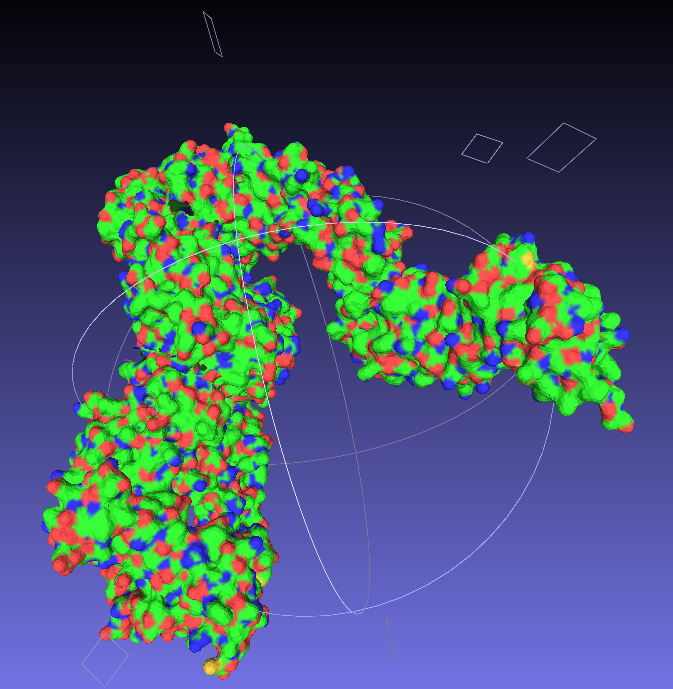
Say goodbye to your lovely colours.

3: Make it printable

Now we have a format that the proprietary 3D printing software can handle. As I primarily only have access to MakerBots, I next open my stl files in MakerWare.

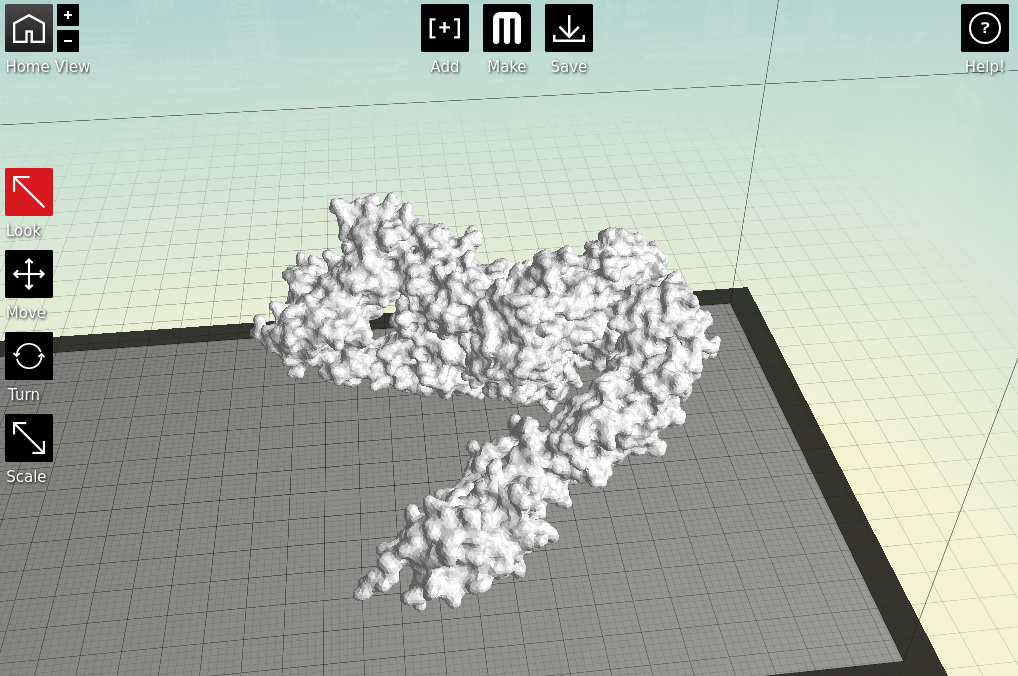
Starting to feel real now, right?
There's a couple of things to take into consideration here. First, is placement; you need to decide which side of your molecule will be the 'top'; remember, most protein structures are going to require scaffolds in order to be printed, which might cause some damage when removed.

Next is the quality of the print. One factor is the scale; the bigger you make your molecule the better it will look, and likely print, at the cost of speed and plastic. Additionally you can alter the thickness of each print layer, the percentage infill (how solid the inside of the print is, up to a completely solid print) and the number of  'shells' that the print has.

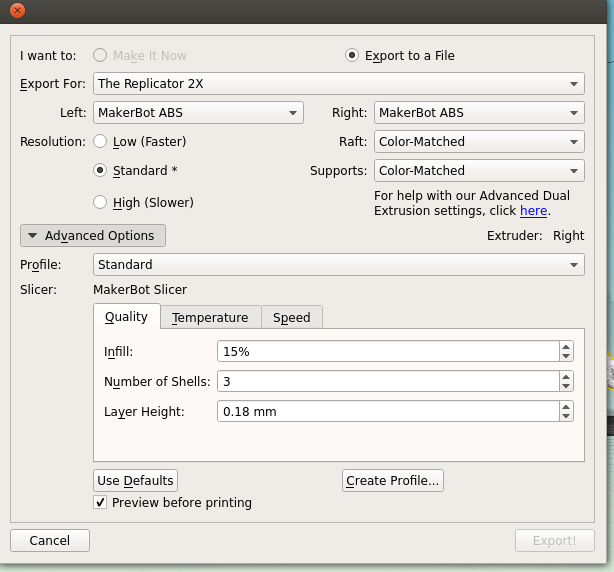
Remember to tick 'Preview before printing' in order to get a time estimate.

4: The print!

Both of my molecules so far have been printed on MakerBot Replicator 2Xs, using ABS plastic, taking between 10 and 14 hours per print due to the complexity and size of the models. This part is also nice and simple; just warm up your printer, load your file and click go.

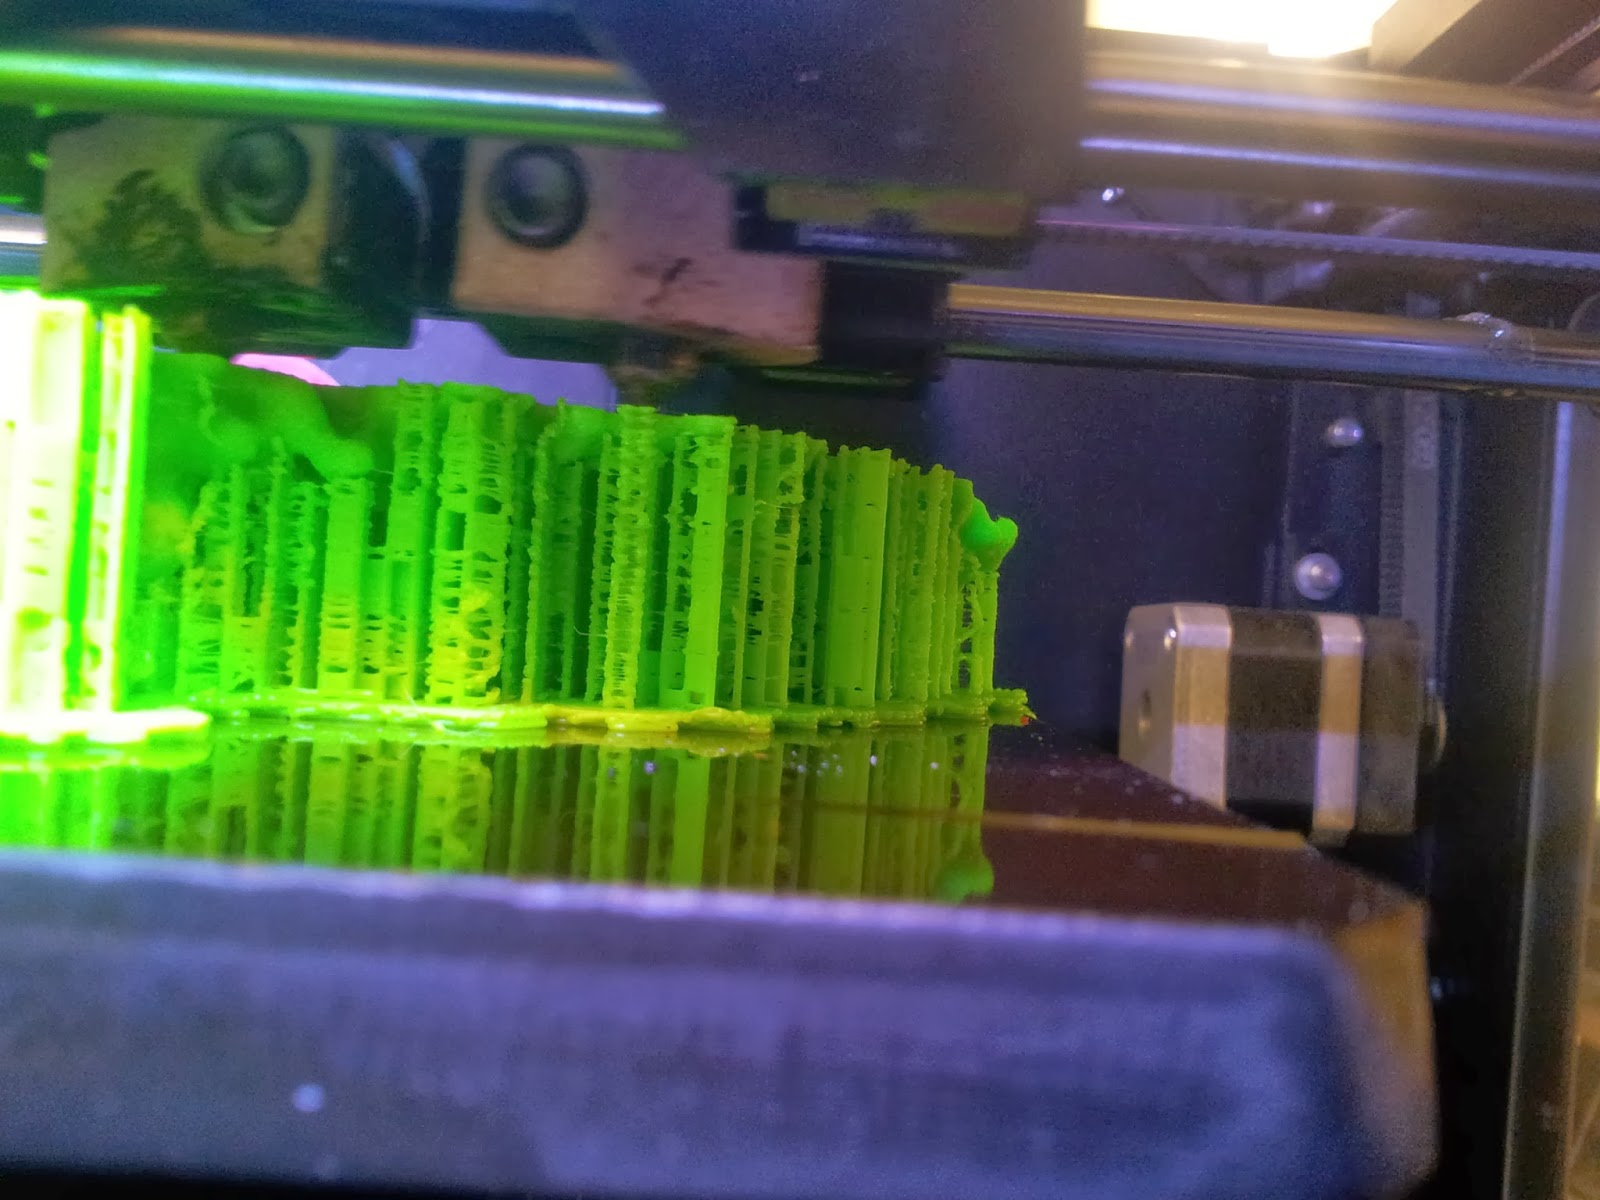
A side view of the printer as it runs, detailing the raft and scaffolds that will support the various overhangs.
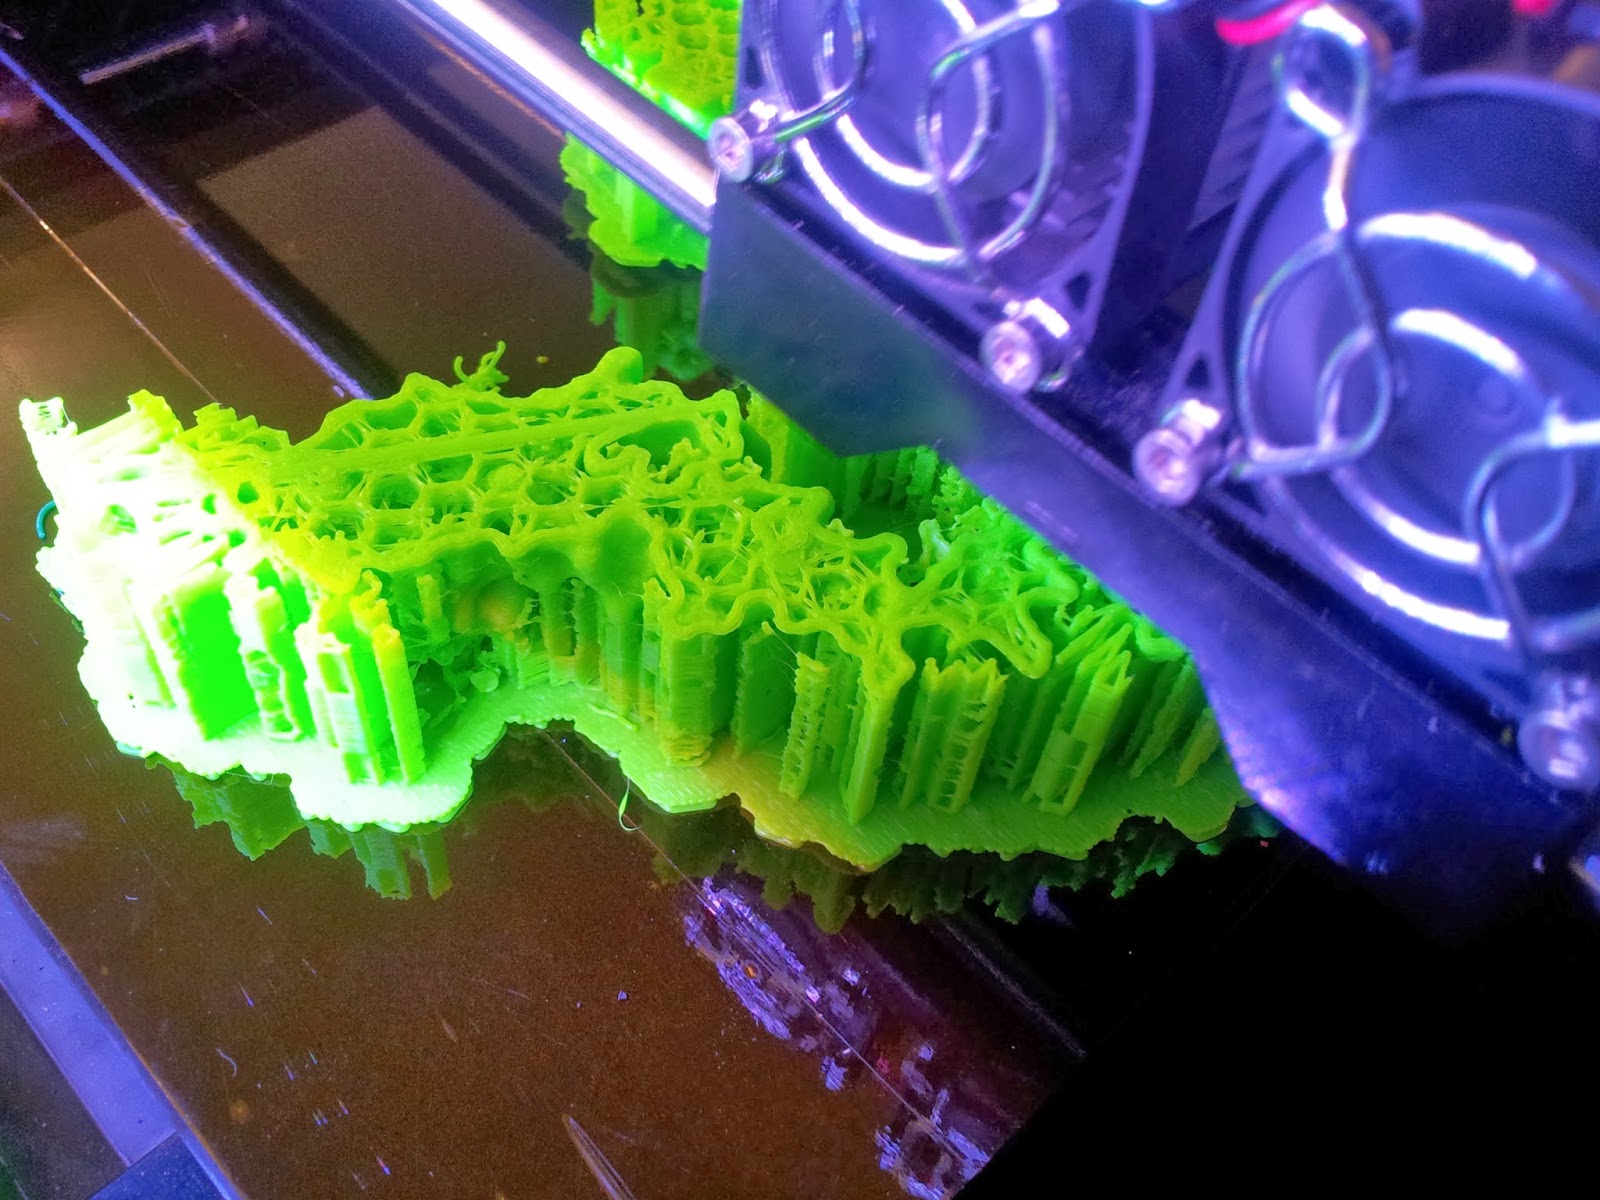
The TCR begins to emerge, with hexagonal infill also visible.

5: The tidy-up

The prints come out looking a little something like this:

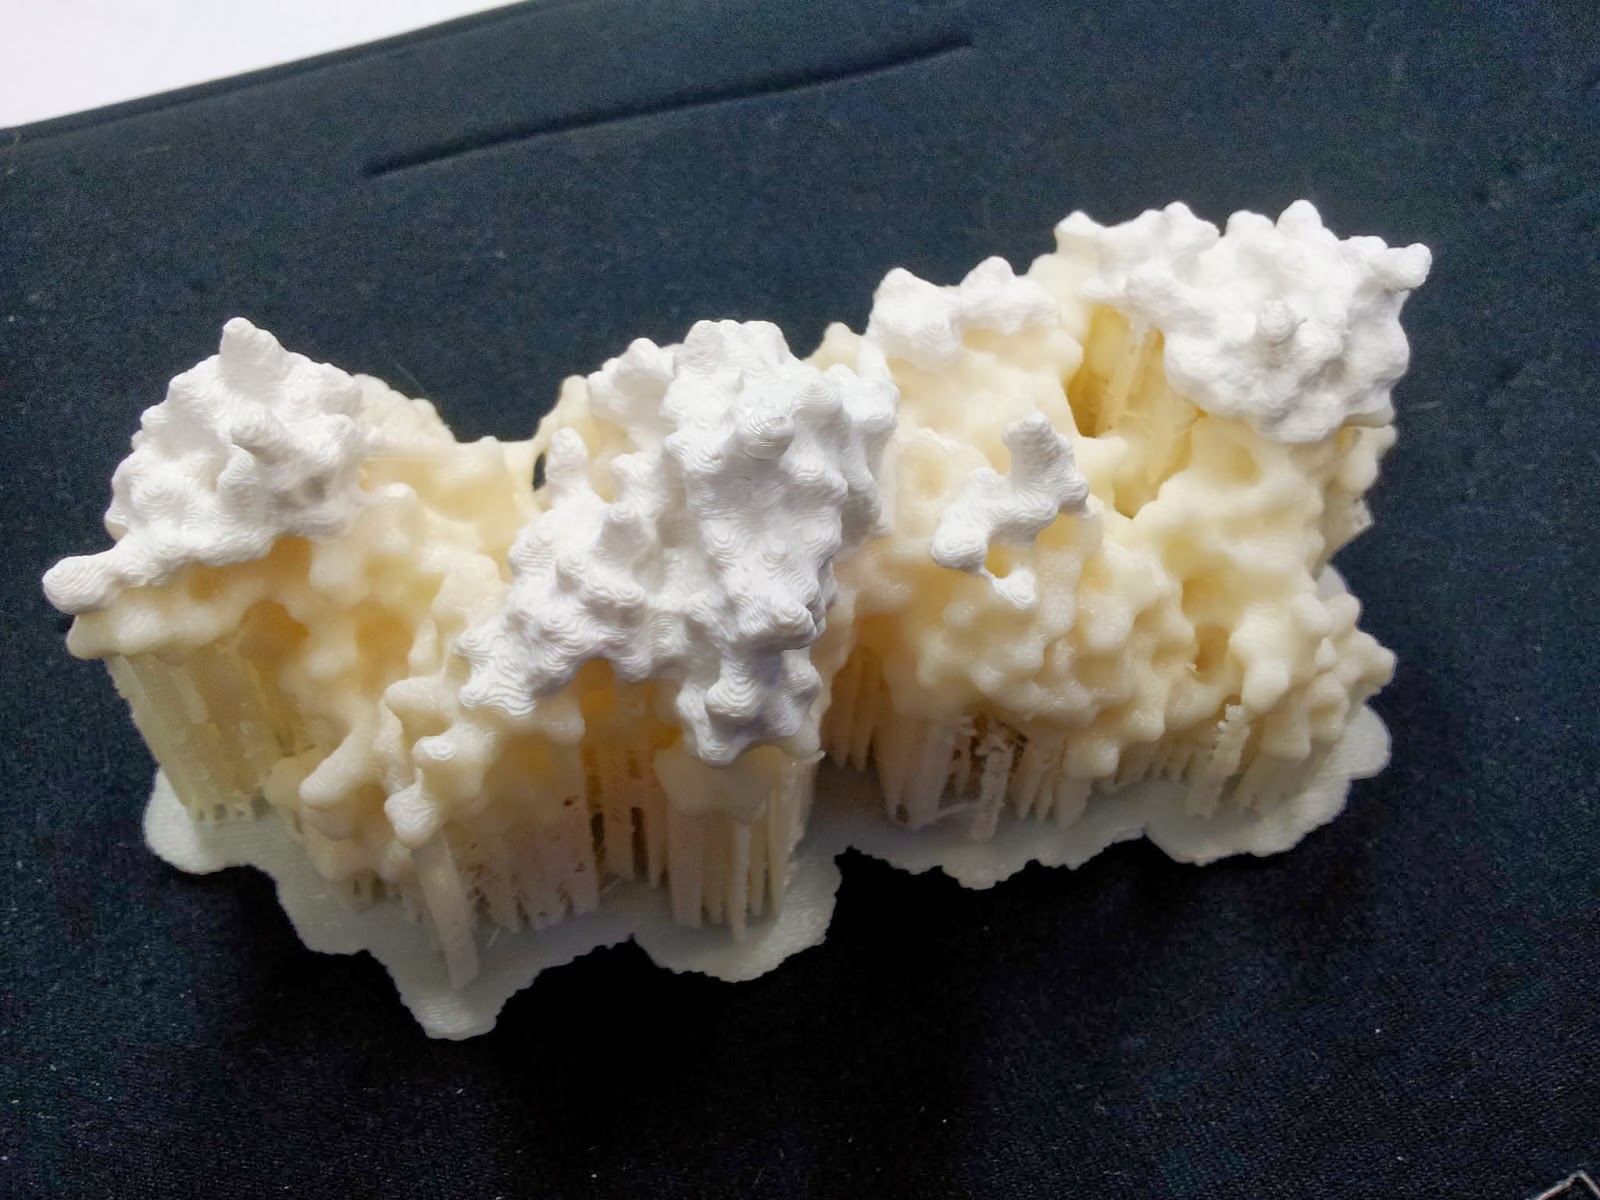
Note the colour change where one roll of ABS ran out, and someone thoughtfully swapped it over, if sadly not for the same colour
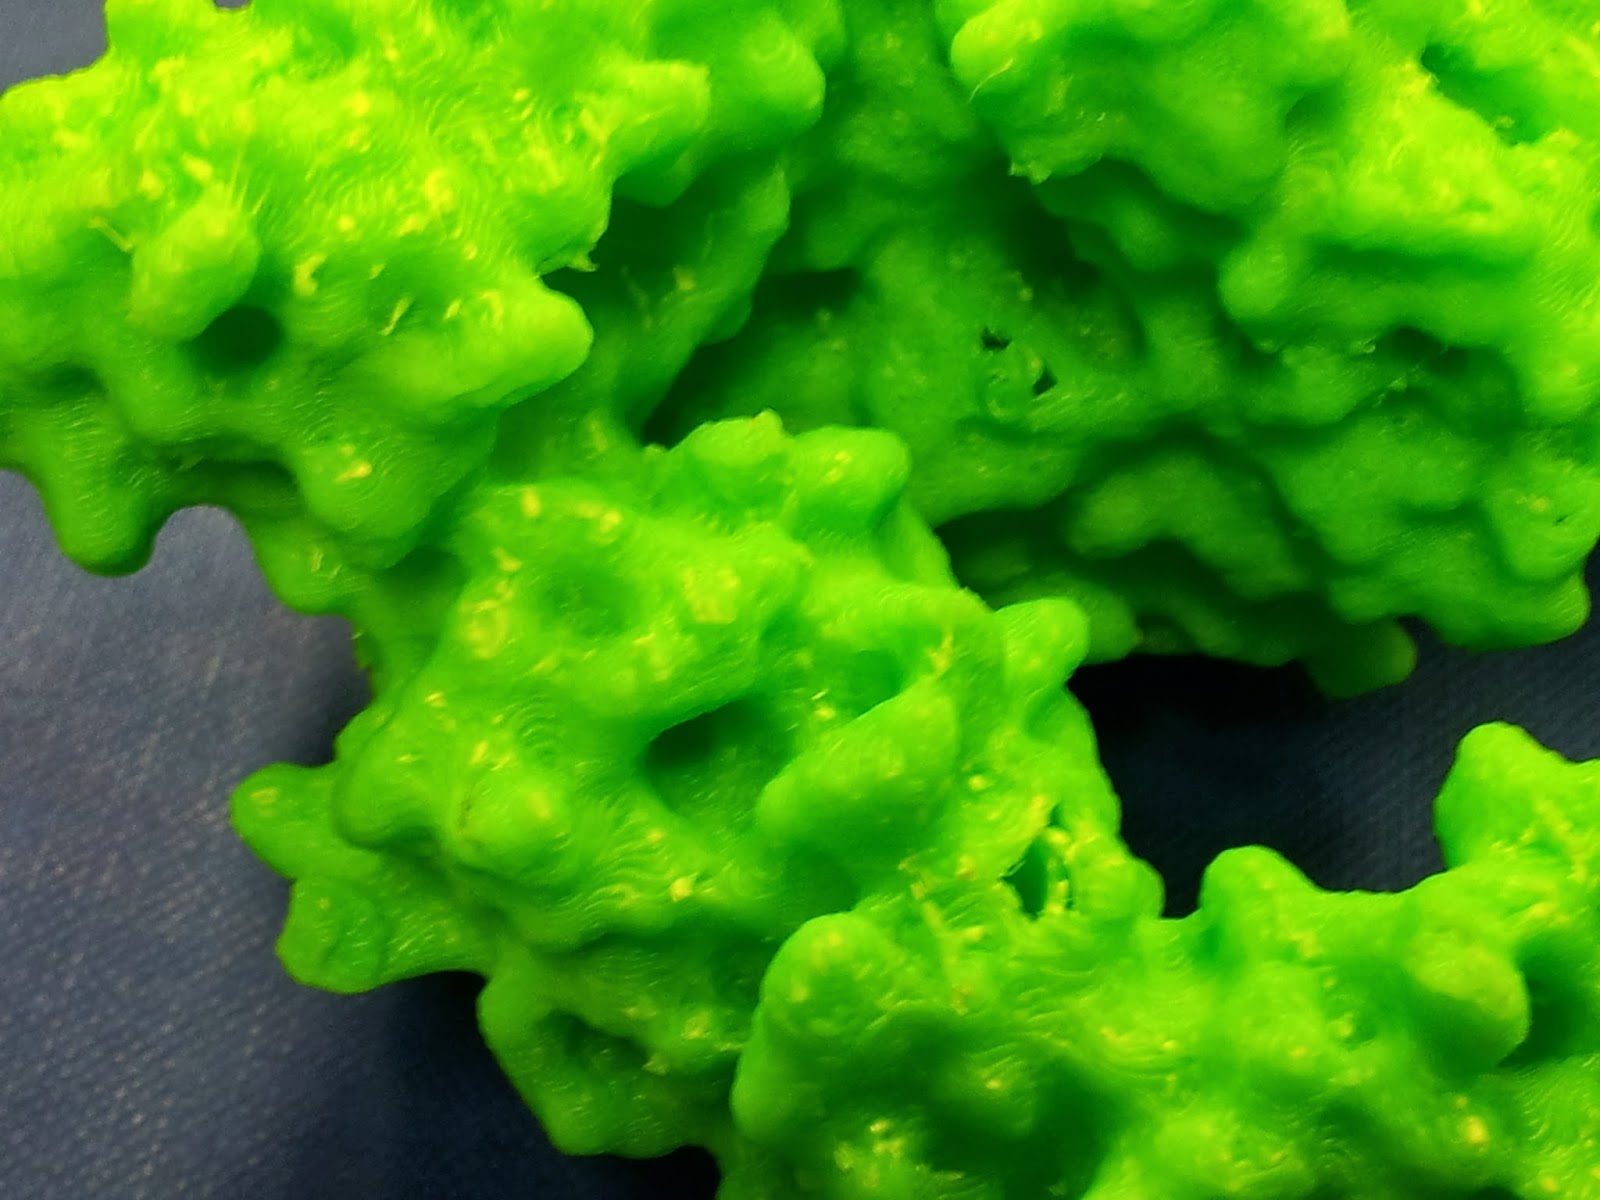
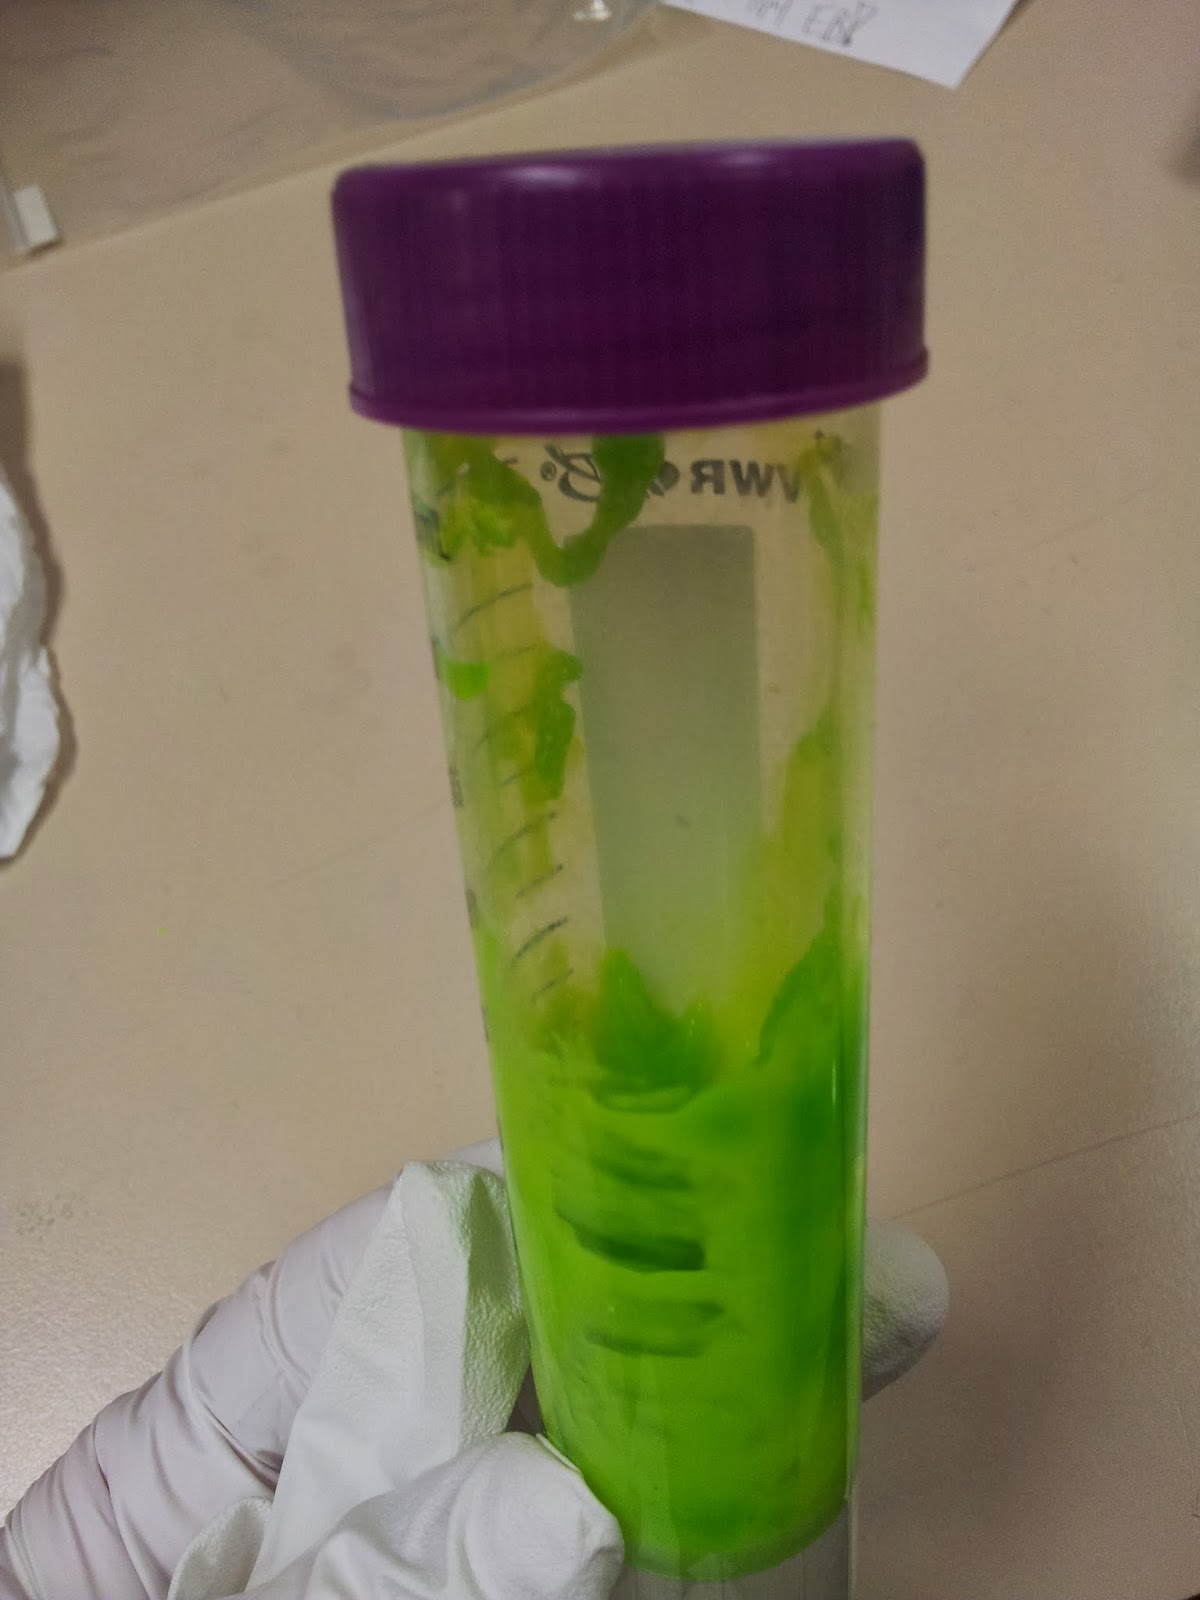
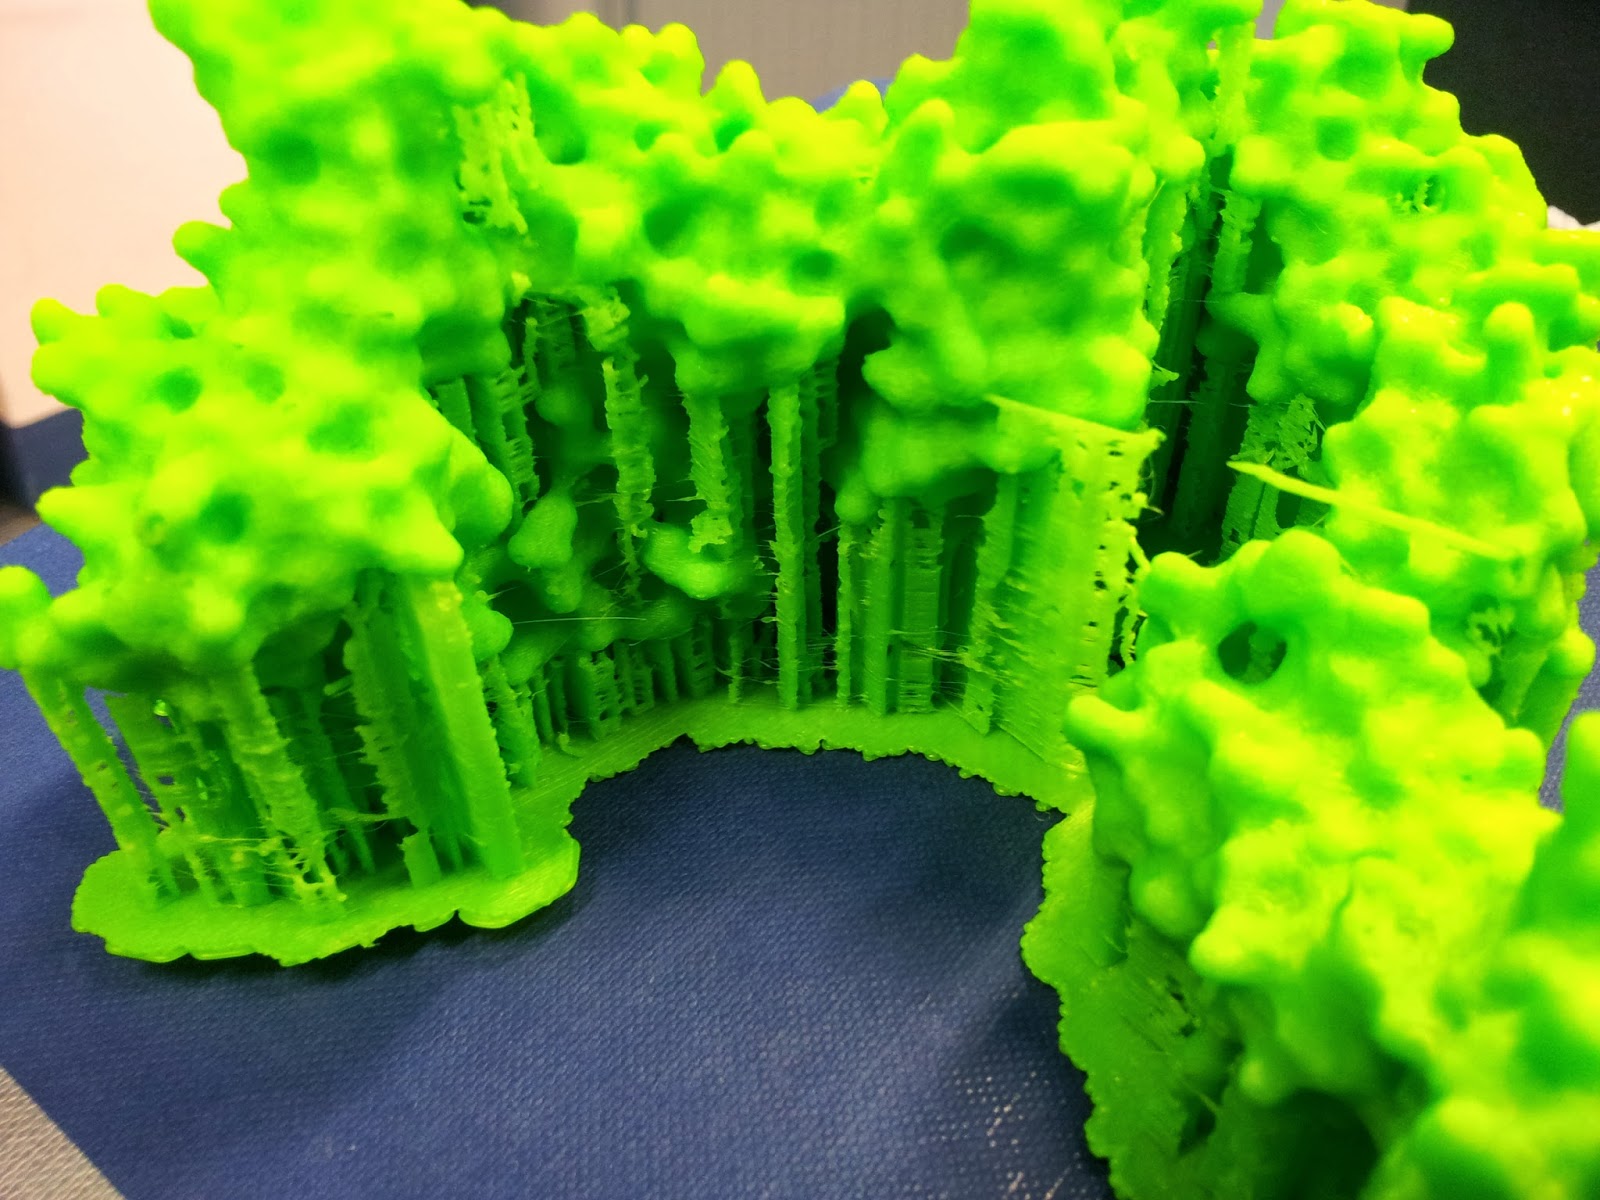
This green really does not photograph well. I like to pretend I was going for the nearest I could to the IMGT-approved shade of variable-region green, but really I was just picking the roll with the most ABS left to be sure it wouldn't run out again.
Then comes the wonderfully satisfying job of ripping off the raft and the scaffolds. Words can't describe just how enjoyable (if incredibly fiddly and pokey) this is.

My thanks go to Katharine and Mattia for de-scaffolding services rendered.
Seriously, this stuff is better than bubble wrap.

Prepare for mess and you will not be disappointed. Instead, you will be picking tiny bits out plastic out of your hair.
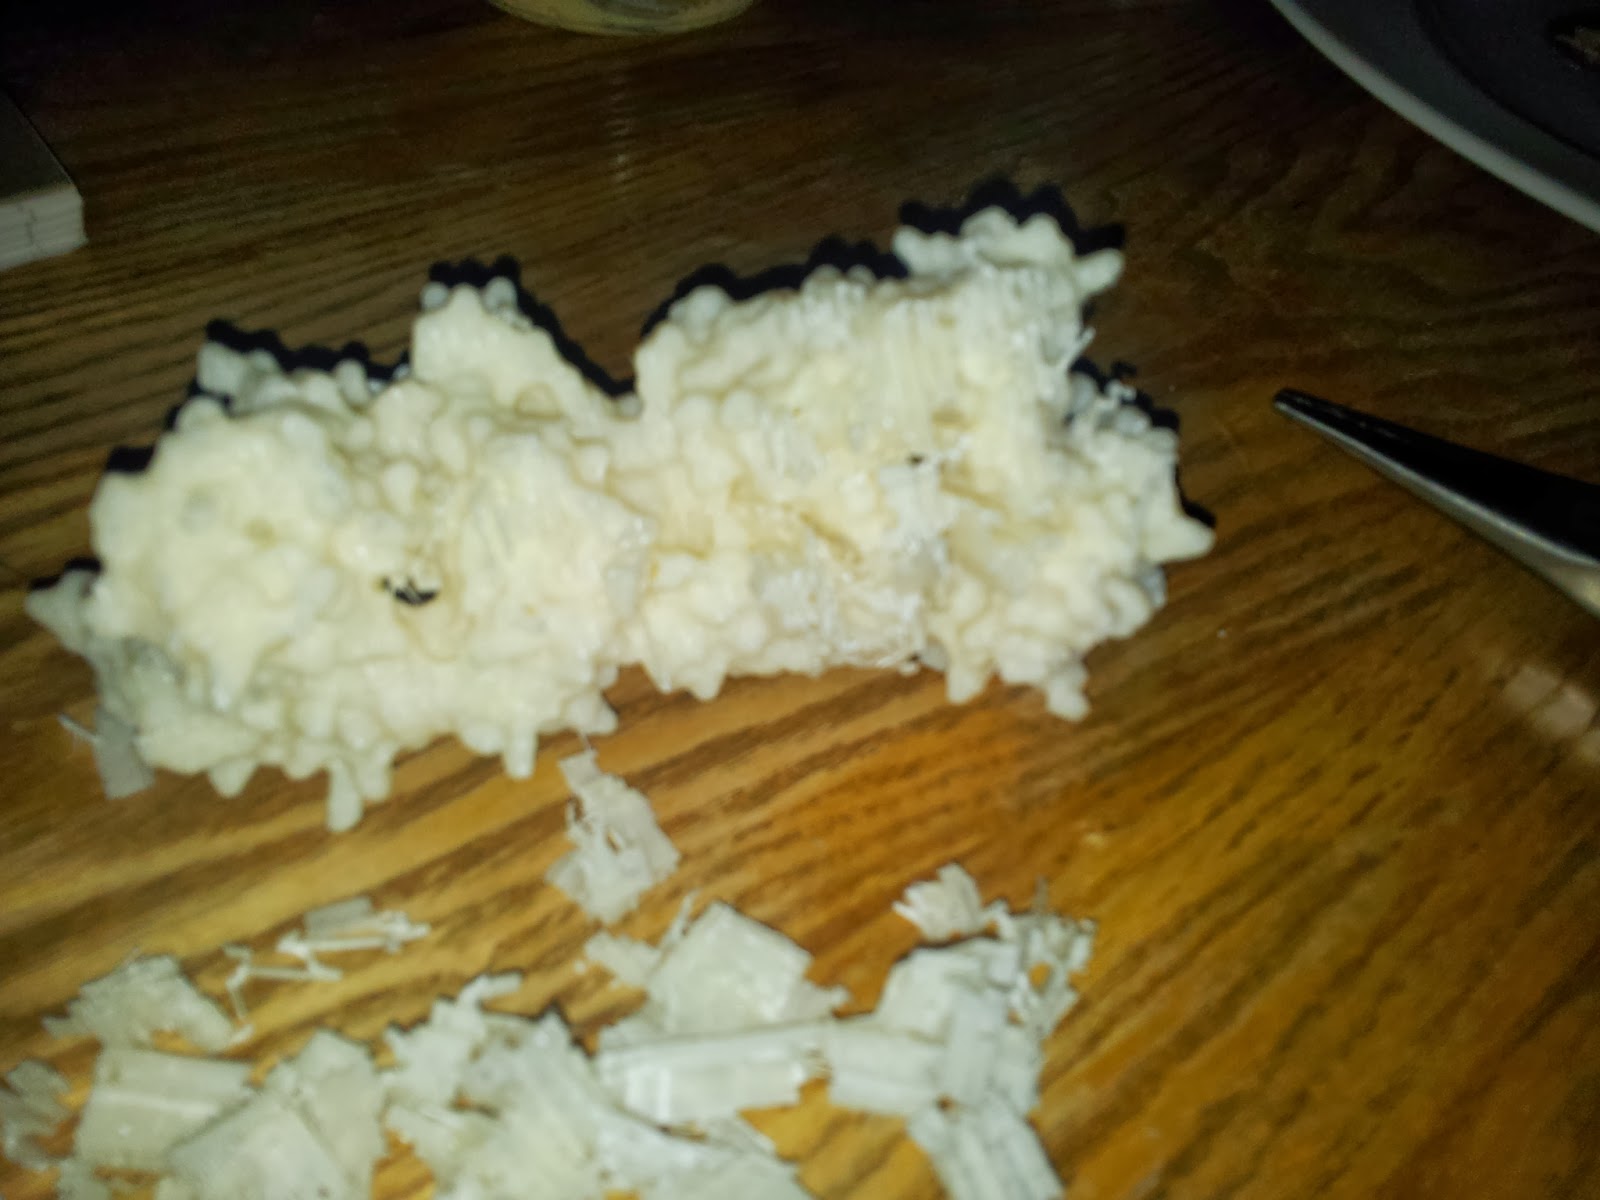
I found a sliding scale of using needle-nose pliers, then tweezers, then very fine forceps seemed to work best. At this point make sure you keep some of your scrap ABS in reserve, as it can be useful later.

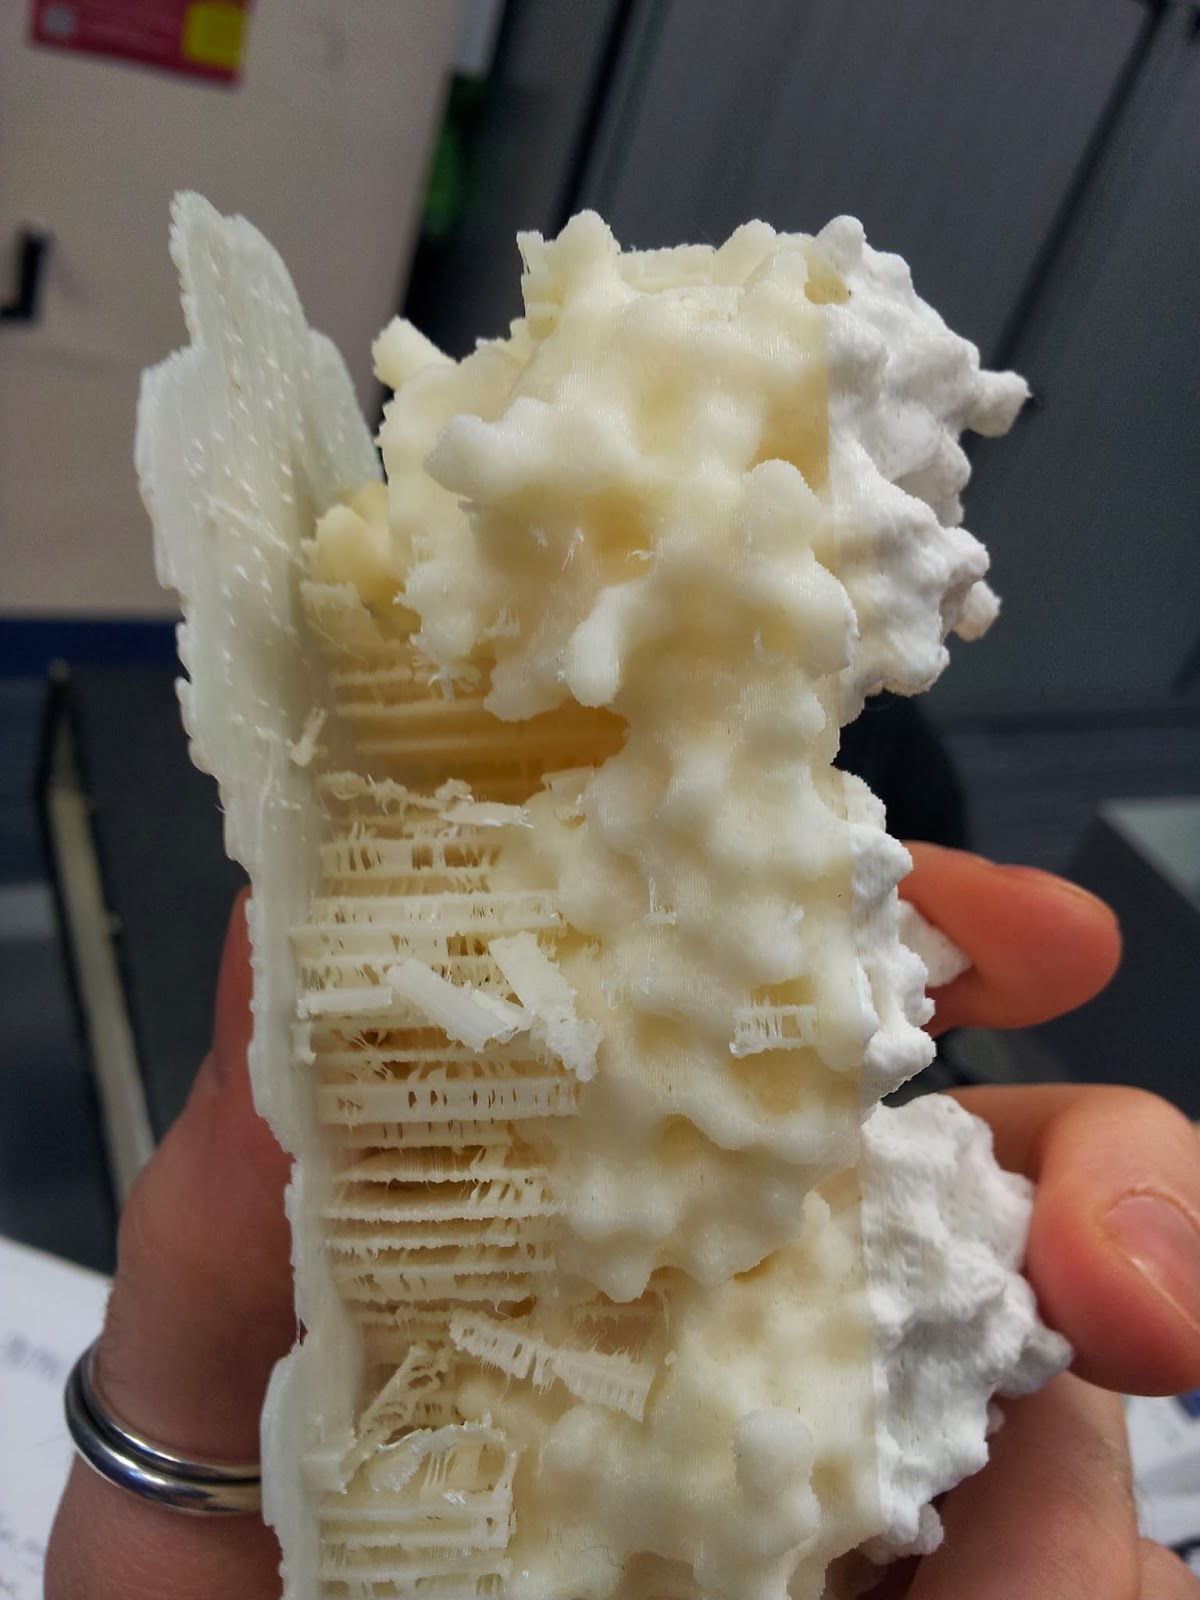
Once you've gotten all the scaffolding off, your protein should look the right shape, if a little scraggy around the edges. I've read that 3D printing people generally sometimes use fine sandpaper here to neaten up some of these edges, which I will consider in future, but generally the surface area to cover is fairly large and inaccessible, so it's not an option I've spent long dwelling on.

The nasty underbelly of the print, after scaffold removal
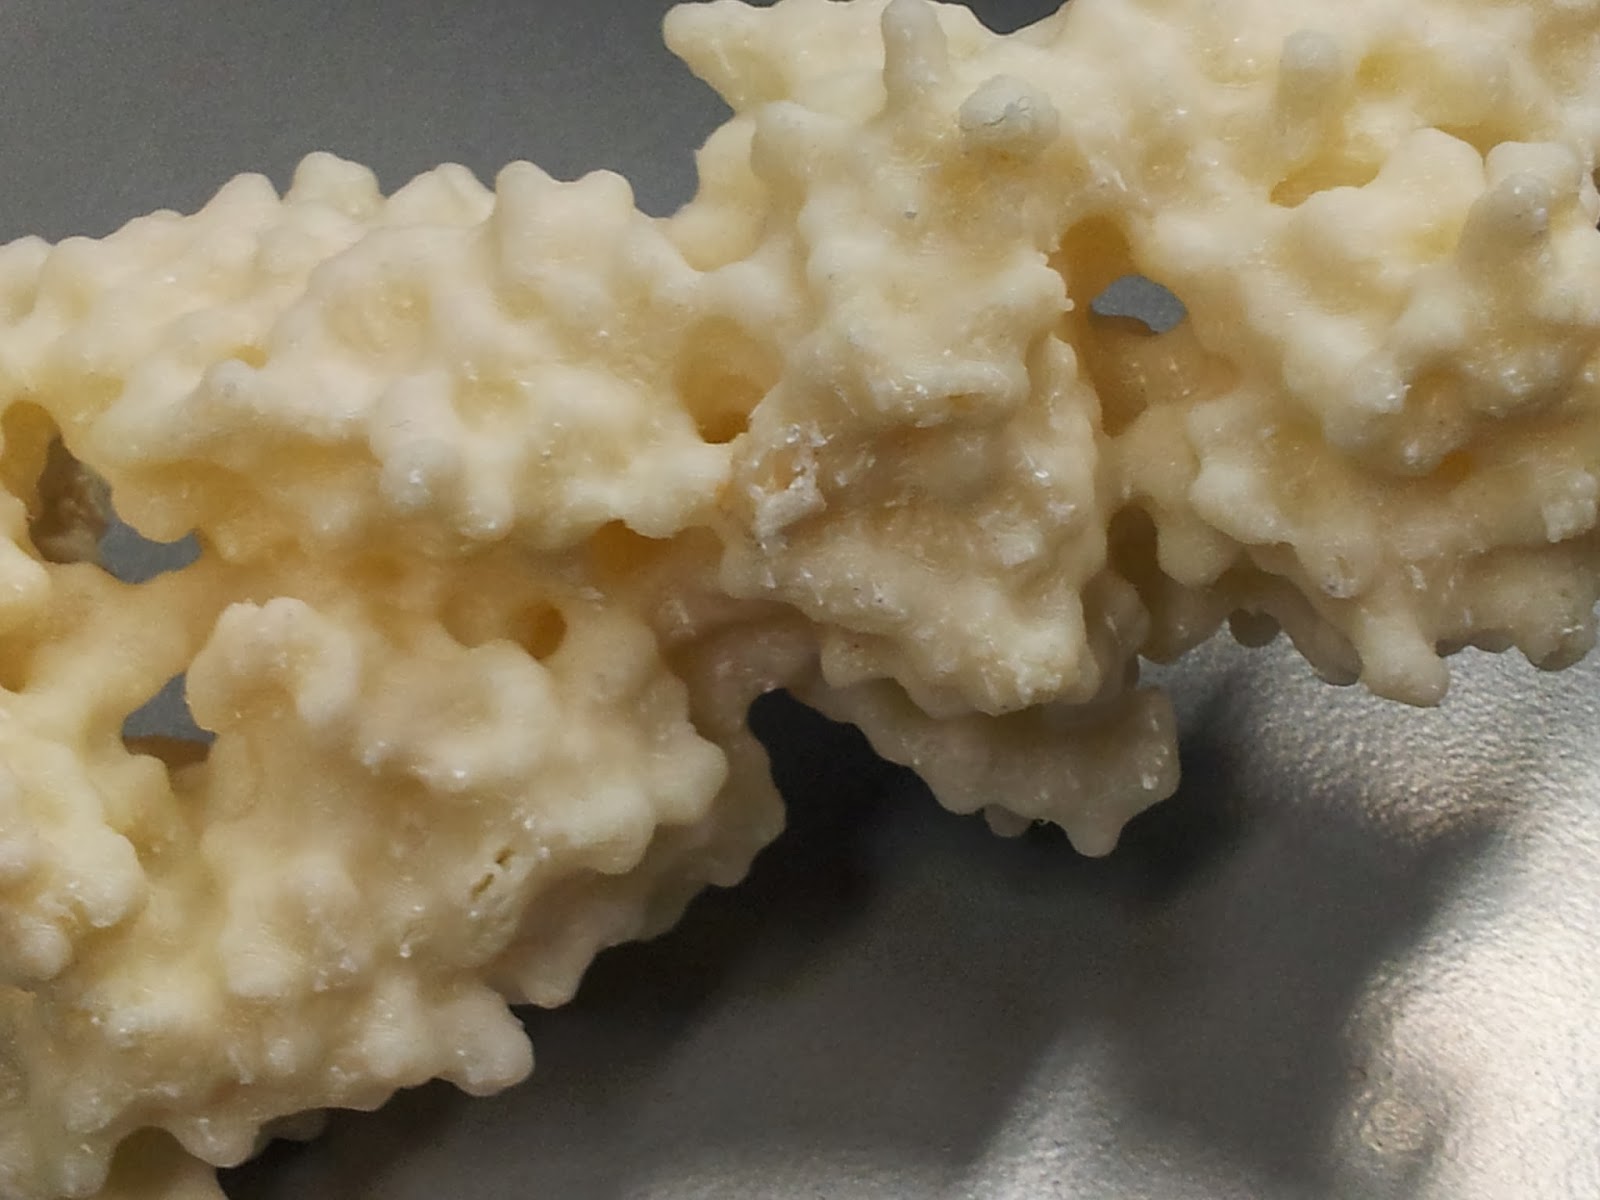
In an effort to minimise such unsightly bottoms in the second print, I went for a higher quality print than I had before (see above MakerWare dialog screenshot), however it still produced both scaffold bobbles and misprint holes - you can see two in the photo below, one just above and one just below slightly off centre to the right.

The other side is much nicer, I promise.
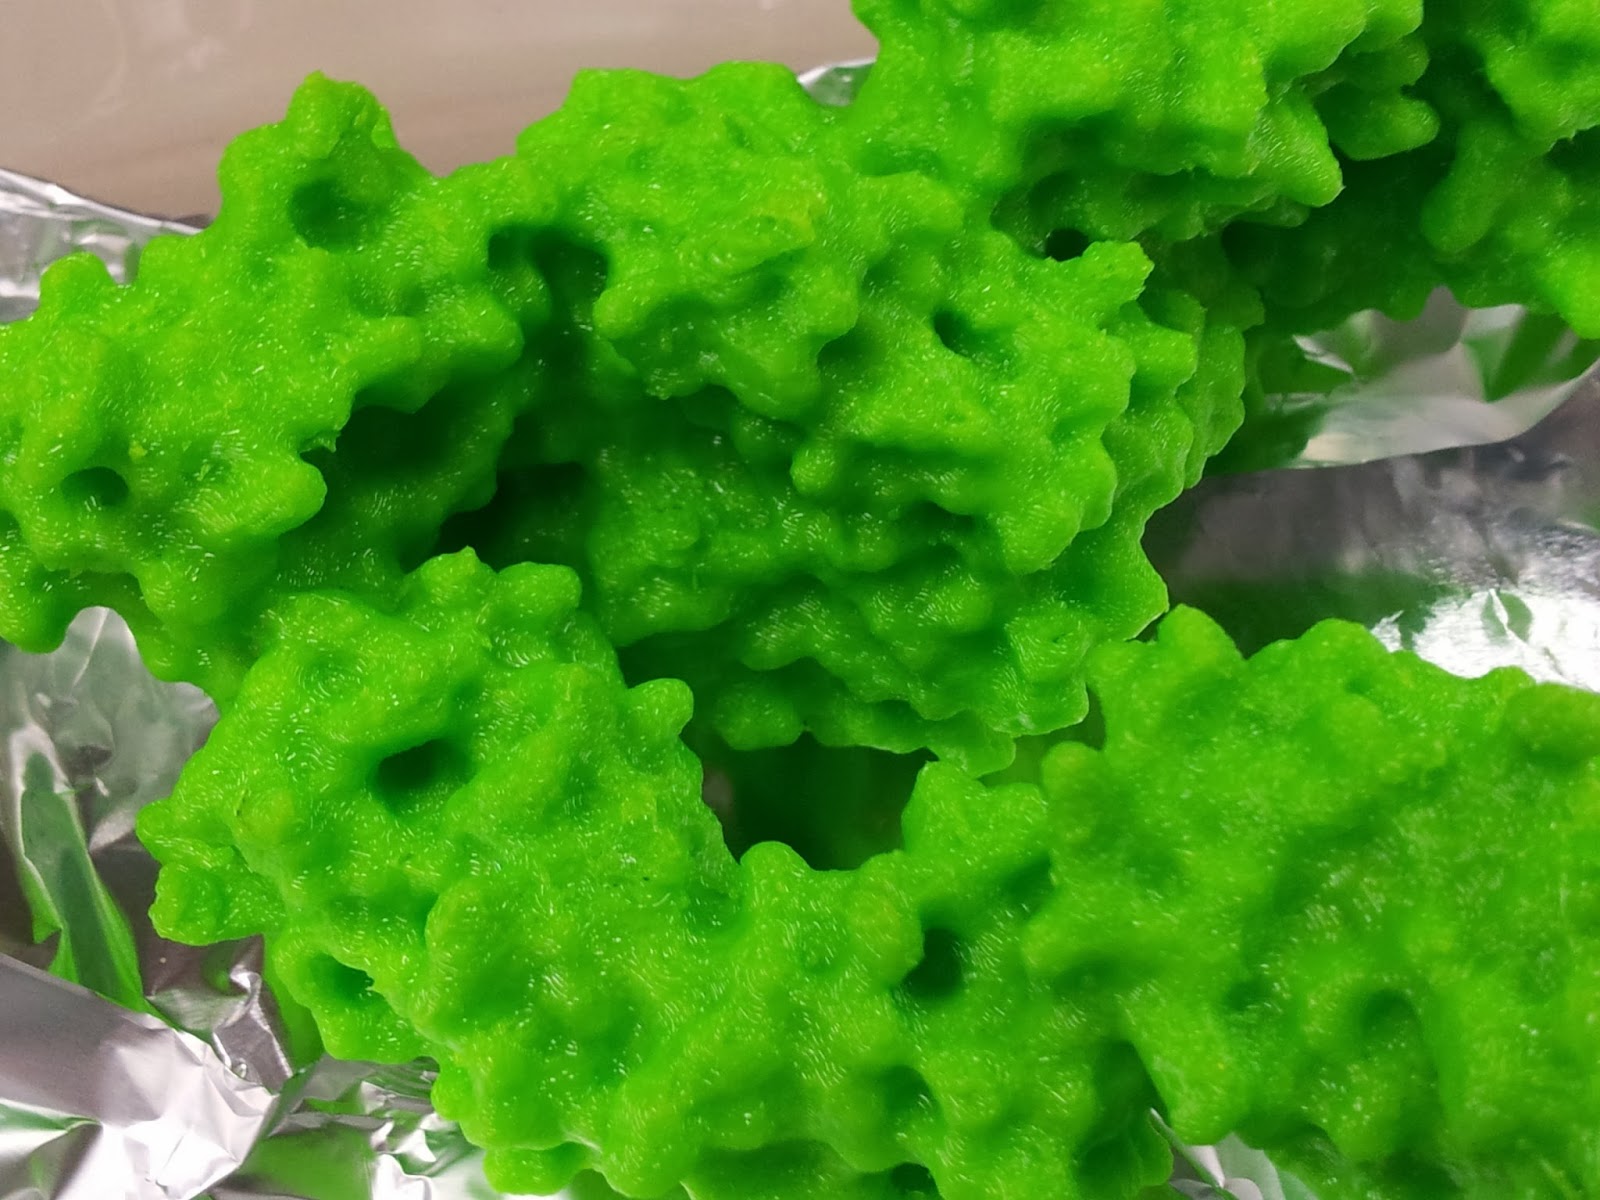
Mmm, radioactive.

However increasing the infill percentage and number of shells had one major noticeable difference; the side chains that stick out are much less fragile than they were on the first print*.

Note that this is also when the spare ABS can come in handy; dissolved in a little acetone, it readily becomes a sloppy paint, which can be slathered on to fill in any glaring flaws in the model.

I should point out that at this point the rest of the model tends to look pretty good (if I do say so myself).

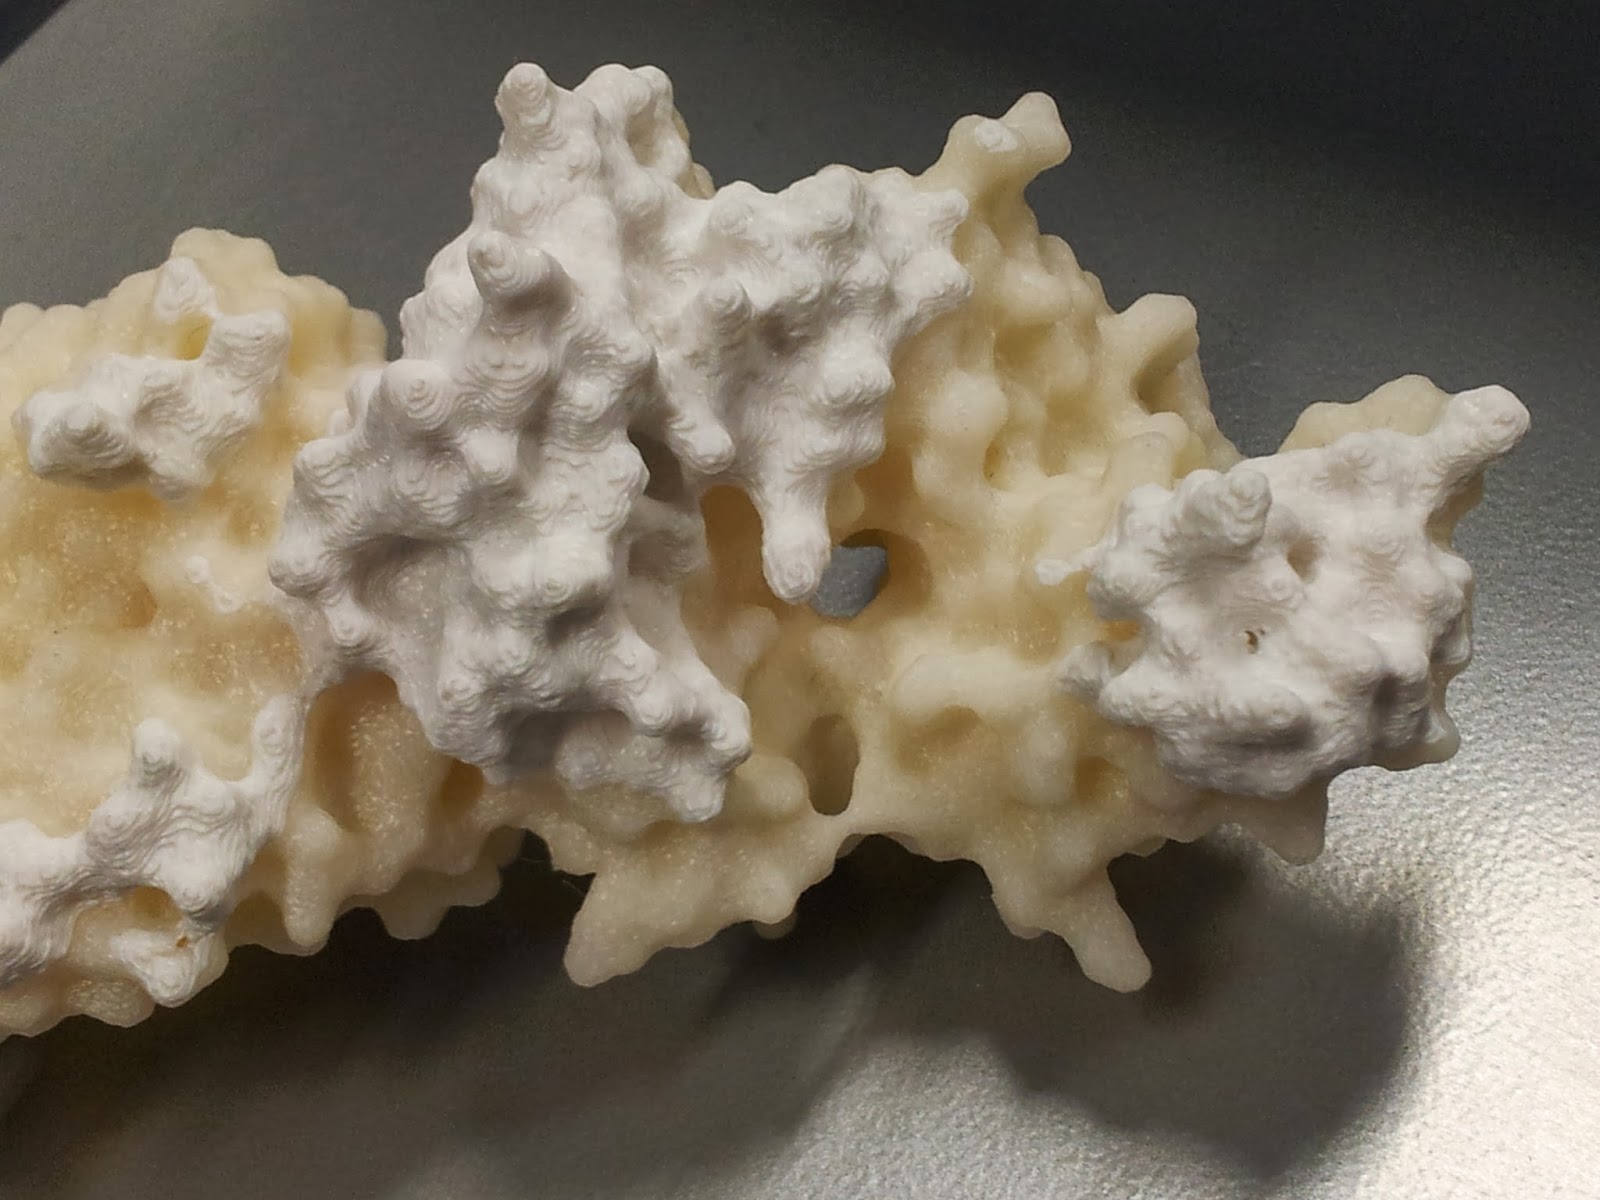
I got a lot of questions asking about the significance of the other colour.

 6: Smoothing

In addition to physical removal of lumps, it's also possible to smooth out the printing layers themselves by exposing the print to acetone vapour for a time, as discussed in many nice tutorials.

I personally like the contour effect of the printing somewhat, and due to the delicate nature of the protrusion-heavy proteins I didn't want to go for an extreme acetone shower, but I think a light application has smoothed off some of the rougher imperfections.

This is a particularly easy thing to achieve for the average wet-lab biologist, as we have ready access to heat blocks and (usually) large beakers. Unfortunately the 3T0E, CD4 containing print was too large for any of the beakers in the lab, so I had to make do.

Nothing pleases me more than a satisfactory bodge-job.
I'm not sure if it was the larger volume or the denser or perhaps different plastic, but this set up took a lot longer to achieve lesser results than the previous model did. However it did still achieve a smoothing of the layers.


Still shiny - and tacky - from the acetone.
It's worth doing this in a well ventilated area, as the combination of acetone vapour and melted-plastic smell aren't the nicest. Bear in mind the print itself will smell for a little while after smoothing, which will upset your office mates.
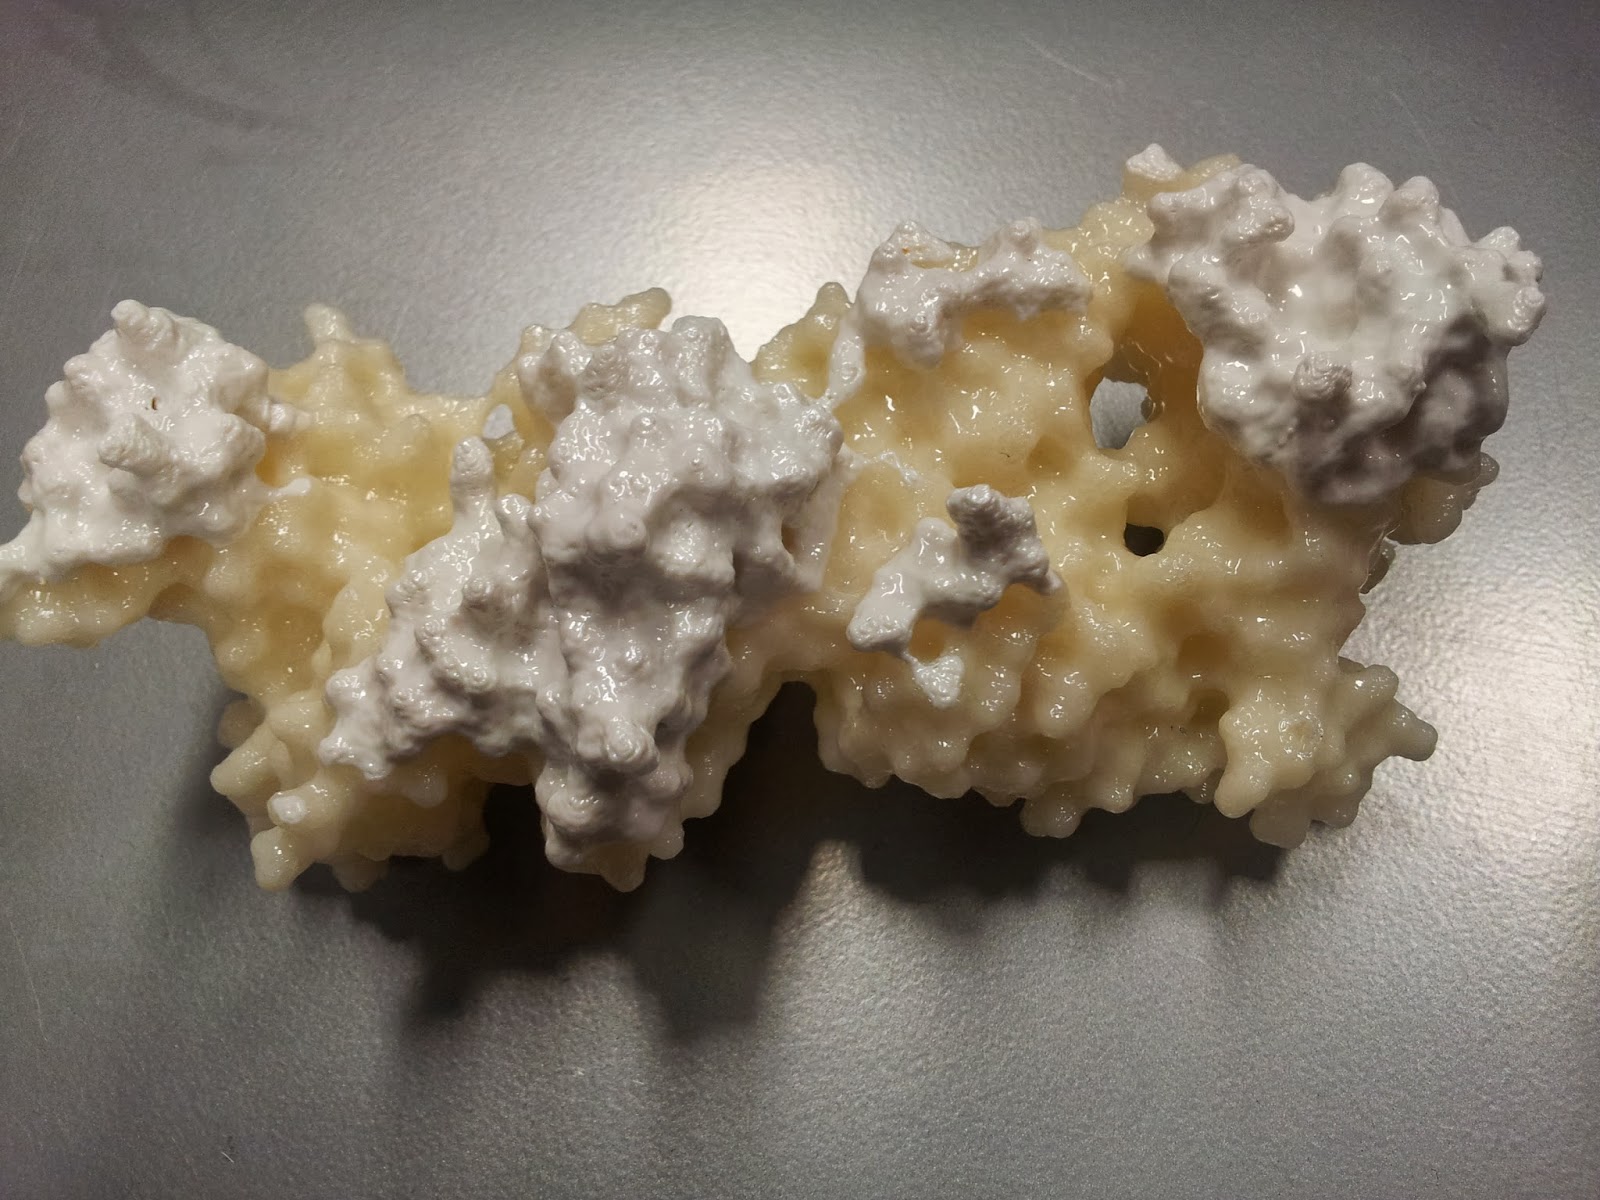
The finished result; the model that made the immunologists of twitter all want rice pudding. What a shame the nice side had the colour change. That the acetone-smoothing appears to have affected the two colours differently suggests that different rolls of ABS do indeed have different dissolving properties.
There you have it, the simple method to easily 3D print the structure of proteins. Honestly, the hardest bit is finding a 3D printer to use.

Or in my case, finding the time to get over there to use it.

* I tell people that I was experimenting with tactile mutational analysis, when really I just dropped the print and a couple of aromatic side chains fell off. Note that they do readily stick back on with superglue.

Immunological 3D printing


Part 1: the pictures

As a good little geek, I’ve been itching to have a play with 3D printers for a while now. At first I’d mostly contemplated what bits and bobs I might produce for use in the lab, but then I started to see a number of fantastic 3D printed protein models.

Form is so important to function in biology, yet a lot of the time we biologists forget or ignore the shape and make-up of the molecules we study. As Richard Feynman one said, “it is very easy to answer many of these fundamental biological questions; you just look at the thing”.

3D printing protein structures represents a great opportunity to (literally) get to grips with proteins, cells, microbes and macromolecules. While I still recommend playing around with PDBs to get a feel for a molecule, having an actual physical, tactile item to hold appeals to me greatly.

So when I got access to the UCL Institute of Making, I got straight to work printing out examples of the immune molecules I study, T-cell receptors. You can read about how I made them here. Or, if you're just here for some pretty pictures of 3D prints, continue; here are the two I've printed so far.

Here are the two finished products! I apologise for the quality: a combination of my garish fluorescent office lighting and shonky camera-phones does not a happy photo make.
My first try: 3WPW. This is the A6 TCR, recognising the self-peptide HuD bound in the groove of the class I HLA-A2. HLA-A2 is coloured in dark pink, with β2 microglobulin in light pink, while the alpha and beta TCR chains are shown by light and dark blue respectively.
I particularly love the holes, crevices and caves pitted throughout the molecules. Having spent a goodly deal of time painstakingly pulling the scaffolding material out of these holes, I can confirm that you do indeed get a feel for the intricate surfaces of these structures.

You can imagine the antigen presenting cell on the left, with the T-cell on the right, as if we were watching from within the plane of the immunological synapse.

As a brief aside, in playing around with the 3PWP structure in PyMol (as detailed in an earlier blogpost) I was surprised to see the following; despite being a class I MHC (the binding grooves of which should be closed in at both ends) we can see the green of the peptide peeking out contributing to the surface mesh.

There's that HuD peptide!
The new addition: 3T0E. This brilliant ternary structure shows another autoimmune TCR, this time recognising a class II MHC, HLA-DR4, with an additional coreceptor interaction; enter CD4! Here we have the TCR chains coloured as above, while the HLA-DR alpha and beta chains are red and magenta respectively. Leaning in to touch the (membrane-proximal) foot of the MHC is the yellow CD4. Note that I took feedback, and this time went for a colour that didn't look so rice-puddingy.
The structure that became my second print was a particularly lucky find, as it contains not only a TCR-pMHC interaction, but also the CD4 coreceptor. This shot is angled as if we're inside the T-cell looking out across the synapse. If you imagine the various components of CD3 clustering around the constant region of the TCR you can really start to visualise the molecular complexity of even a single TCR-pMHC ligation event.

It's also quite nice to see that despite the differences in HLA composition between classes (one MHC-encoded chain plus B2M in class I versus two MHC-encoded chains in class II), they structurally seem quite similar by eye - at least at a surface level scale.

There you have it, my first forays into 3D printing immunological molecules. Let me know what you think, if you have any ideas for future prints - I'm thinking probably some immunoglobulins for the next run - or if you're going to do any printing yourself.

Tuesday, 20 November 2012

3D print lab combs

Ever since I read Cory Doctorow's Makers, I've wanted a 3D printer (or at least access to one). Completely unjustifiably, I might add; I freely admit I just want to play, maybe make some custom lego bricks or miniatures of myself or something frivolous.

So it is with great excitement that I read stories like this, about people generating standard, useful lab equipment in house using 3D printers (Russel's blog is particularly relevant, as I could do with some custom mixed-width gel combs that aren't available commercially!).

Every story I read is one step closer to 3D printers becoming standard lab items, making me able to make my own unnecessary bits of plastic fun practical pieces of lab equipment cheaply and conveniently.

Update: I just did a quick search on Thingiverse (a repository of files and instructions to construct objects with tools like 3D printers and laser-cutters), and there already is a selection of electrophoresis parts available.

I have a feeling the DIYbio movement is going to run riot with this technology.